

I love a balloon feature, but they are so expensive to have professionally done. I had no idea how easy they were to do yourself. They are a little time consuming to construct, but if you have the right tools, you can pretty easily make them look *almost* as good as having one professionally installed. I’ve collected a few props over the years, and most of it is pretty inexpensive on Amazon. If you look close, you can tell it isn’t professional. At a fraction of the price, though, it is just fine for what I’m doing.
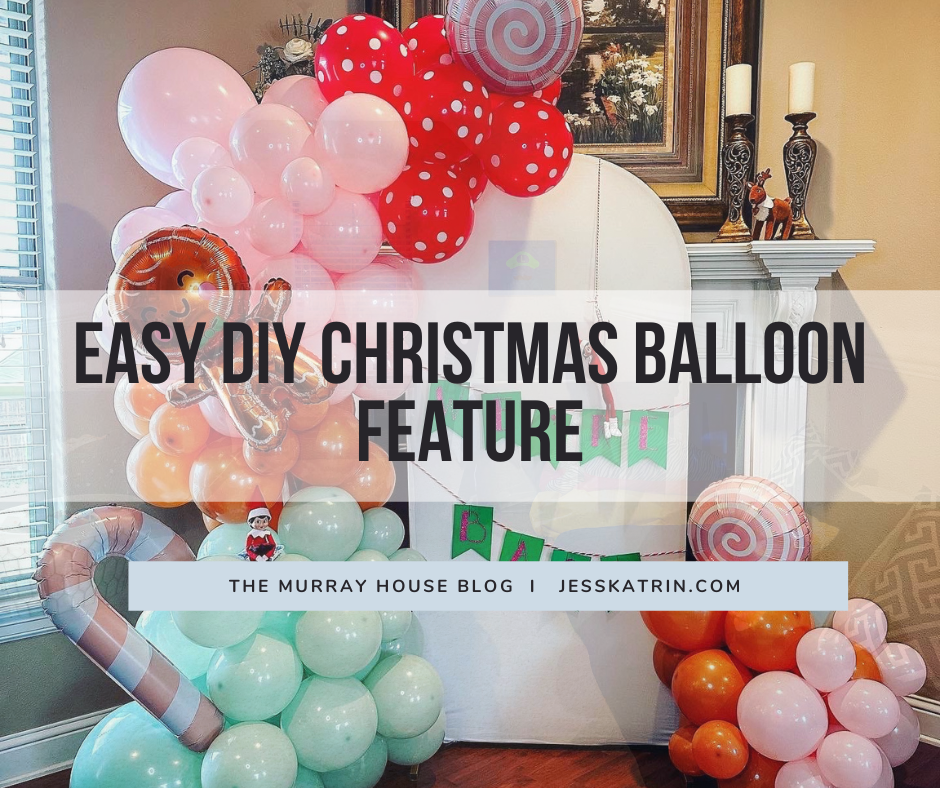
Here’s my first one of the season, and I think it came together pretty cute. An inexpensive kit from Amazon had all of the balloons I needed for this one. In fact, I actually had some leftover. The arch cover was a new addition that I really loved and I can’t wait to use it again. It took about 40 minutes to inflate the balloons and group them in bundles, and maybe another 45 minutes/hour to assemble the arrangement. I’ll give a run down of the tools I used and a few tips I think make these come together easily.
*Disclosure: This post may contain affiliate links. This just means that if you make a purchase from one of the links, we earn a small commission at no additional cost to you.
What I used
- Balloon kit of your choice
- Arch frame / Cover
- Balloon support (optional, but useful if you are using the arch cover)
- Double inflating electric pump
- Long twisting balloons
- Packaging tape
- Weights for any frames used (all of our frames came with bag weights but we used these)
Building your arrangement

I started by assembling my arch, setting out my support post, then using my electric pump to inflate the balloons. Instead of tying each one closed individually, I inflate them 2 at a time and then tie them together. Go ahead and group them as you go in groups of either 2, 4, or 6. It will just depend on how full you want your base arrangement to be. For this particular background, I grouped my 12 inch balloons in groups of 4 and my 5 inch balloons in groups of 2. There weren’t as many of the red polka dot balloons, so I just left them in groups of 2 because I wasn’t sure how I would end up placing those.

Once I was finished inflating them all, I started stringing together the bundles of 12 inch balloons using a long tying balloon. Since I didn’t really have a plan in mind for this one, I just grouped all the colors together and then stacked them all on a support post. You can probably get away with just pressing your balloons on to the post, but I tie mine on with the long balloons just to be secure. I stacked what I needed to get to the top center of my arch wall, then bundled a few more 12 inch balloons to accent the opposite side. I didn’t think I would need a weight for it since I was on level flooring indoors, but quickly realized I did.

Next I inflated the foil balloons and taped a long balloon to the back of them with packaging tape. I used the long balloon to tie them in to the arrangement. I like this method instead of glue dots or hot glue because you can shift it around and rearrange it if you need to. It will also allow you to deflate and reuse your foil balloons a couple of times if you’re careful with them.

The last thing I like to do is the 5 inch balloons. I like doing these a couple of different ways. You can tie a bundle to either end of a long balloon and then wrap them into the arrangement, or you can tie one end of a long balloon to a single 5 inch bundle and then tie it in. I will just use these as needed to fill in any gaps where you can see the “guts” of the arrangement. It really finishes it off and makes it look full.
And that’s it!
It really is pretty easy to put together. For some backdrops I may use some larger or smaller sizes for my balloons, depending on how much space I am needing to take up. It may take a couple of times before you get the hang of it. Once you get a few tricks under your belt, it really comes together pretty quick, and you’ll get a feel for what size balloons you like best for different occasions.